Hexo 与 GitHub Pages 安装配置请参考:Hexo 与 GitHub Pages
本文源码与生成的静态文件在同一项目下,源码在 source 分支,静态文件在 master 分支
新增 token
登录 GitHub: Settings–> Developer settings–> Personal access tokens–> Generate new token
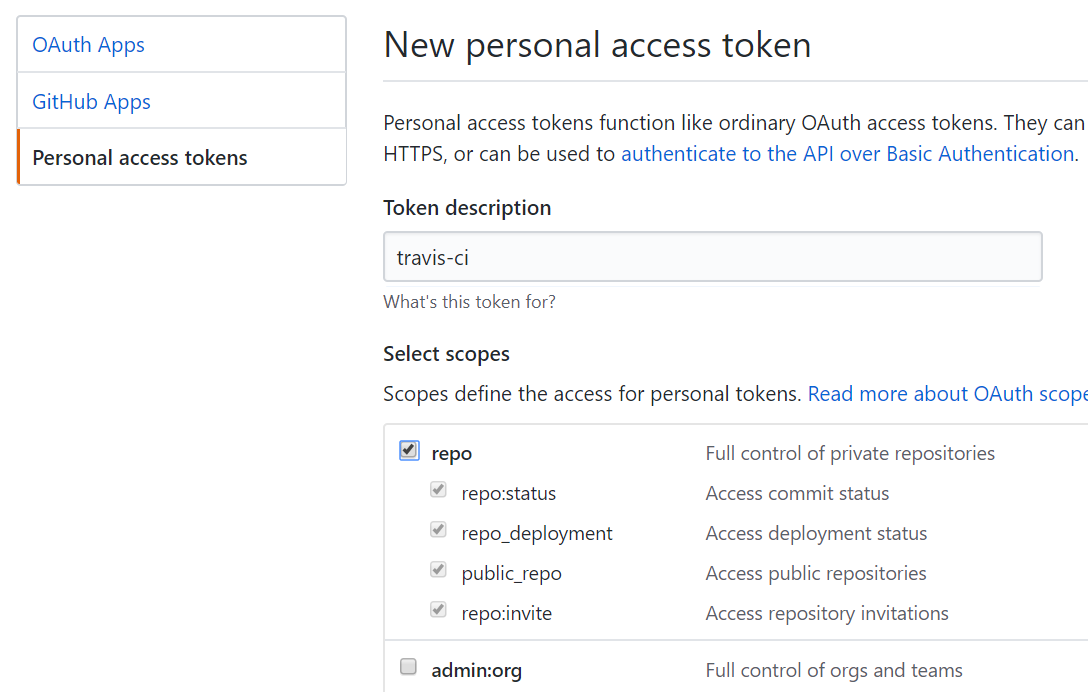
记下产生的 token
使用 GitHub 帐号登陆 Travis CI ,开启项目:
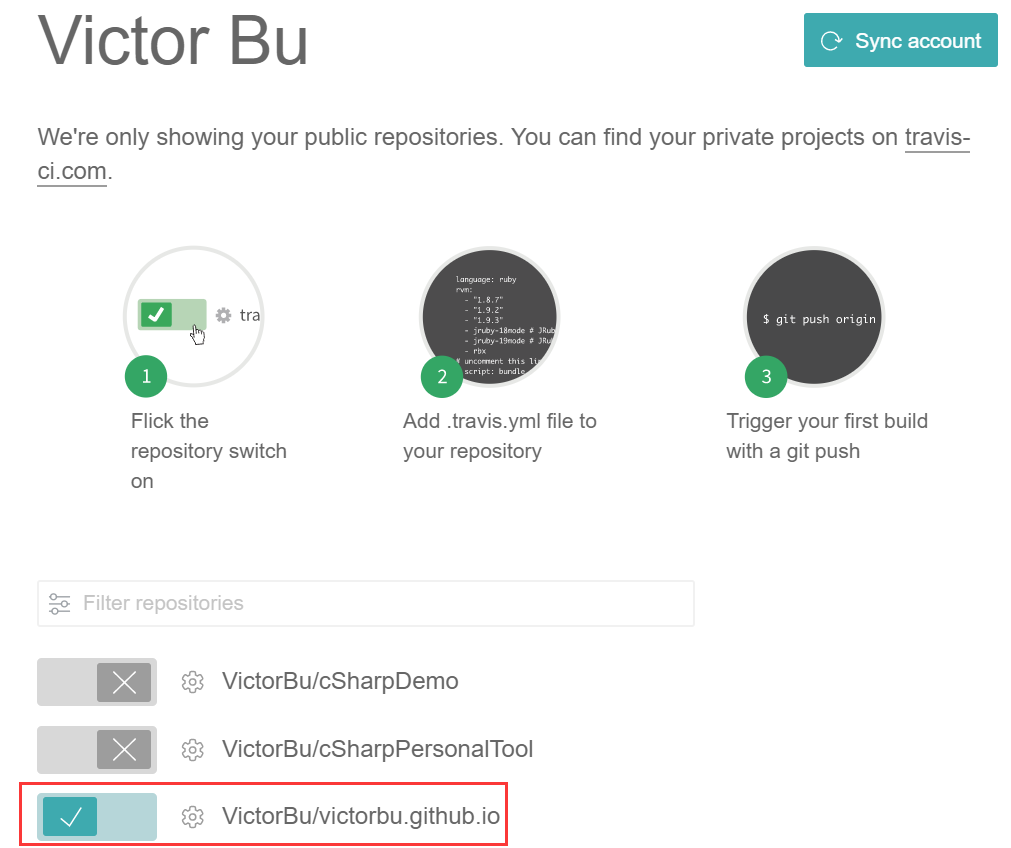
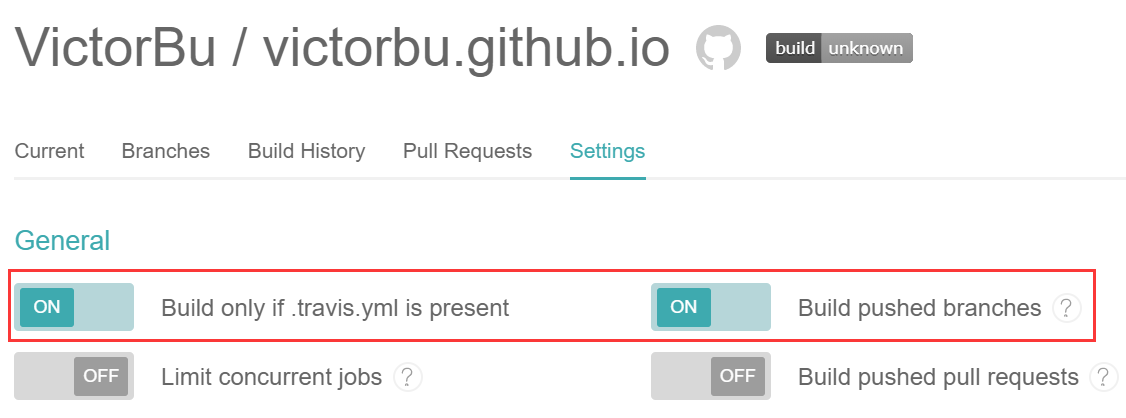
项目设置:
新增 travis 配置文件
在源码根目录新增 .travis.yml 文件,内容如下:
1
2
3
4
5
6
7
8
9
10
11
12
13
14
15
16
17
18
19
20
21
22
23
24
25
26
27
28
29
language: node_js
node_js: stable
install:
- npm install
script:
- hexo g
after_script:
- cd ./public
- git init
- git config user.name "VictorBu"
- git config user.email "victorbu.xx@gmail.com"
- git add .
- git commit -m "add/edit"
- git push --force --quiet "https://${github_token}@${GH_REF}" master:master
branches:
only:
- source
cache:
directories:
- node_modules
env:
global:
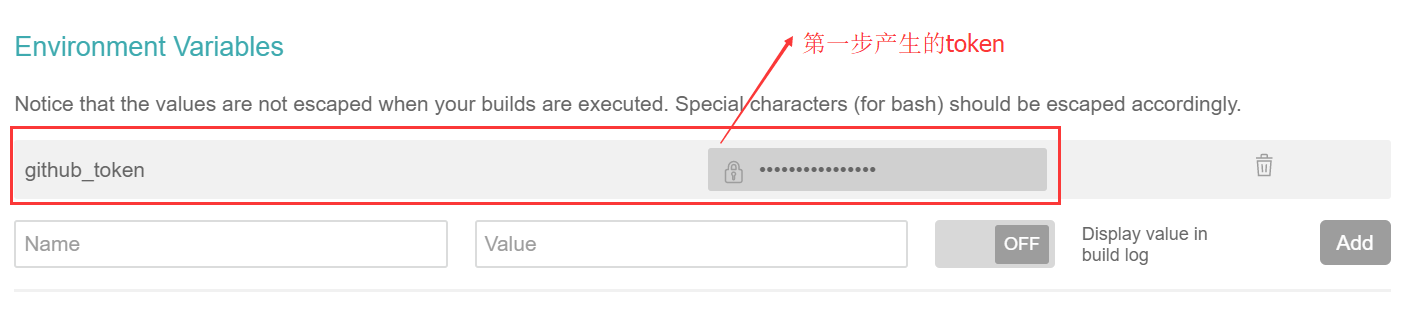
- GH_REF: github.com/VictorBu/victorbu.github.io.git- github_token:为前面步骤 Environment Variables 中设置的 token 变量名
- branches:设置源码所在的分支,本文为 source
- 修改 user.name, user.email, 仓库地址, 静态文件对应分支
push 文章到 source 目录,Travis CI 即会自动编译并发布
备注
如果需要绑定域名,把 CNAME 文件放置在源码的根目录/source 文件夹下即可